As an Amazon Associate, we earn from qualifying purchases. Some links on this site are affiliate links at no extra cost to you. Our recommendations are based on thorough research and editorial judgment.

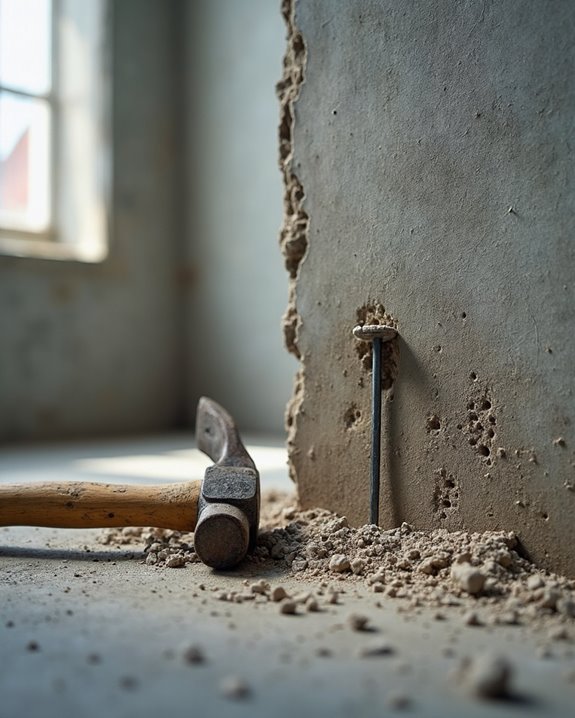
How to Hammer a Nail Into Concrete Wall Without a Drill
To hammer a nail into concrete without a drill, select hardened steel masonry nails with fluted shafts designed specifically for concrete penetration. Wear safety glasses and gloves to protect against fragments, then mark the exact position on a clean surface. Hold the nail perpendicular to the wall and start with light taps using a 2-pound mash hammer, gradually increasing force until the nail penetrates, leaving approximately 1/8 inch exposed. Proper technique guarantees secure fastening while maintaining wall integrity.
Key Takeaways
- Use hardened masonry nails with fluted shafts specifically designed for concrete penetration.
- Wear safety glasses, gloves, and respiratory protection to guard against concrete fragments and dust.
- Mark the exact spot, clean the surface, and check for wall weaknesses before starting.
- Position the nail perpendicular to the wall and tap lightly with a 2-pound hammer to create an initial depression.
- Apply consistent, straight strikes with increasing force until the nail penetrates, leaving approximately 1/8 inch exposed.
Understanding Different Types of Concrete Nails
The selection of an appropriate concrete nail greatly impacts the success of any fastening project, with several variants available to match specific environmental conditions and application requirements. Concrete nails, typically made from hardened steel to provide strength and durability, come in specialized finishes to address different exposure conditions. Electro-galvanized fasteners offer economical protection for indoor projects, while hot-dip galvanized nails deliver superior performance when driving nails into concrete in outdoor settings. For environments with chemical exposure, acid-resistant masonry nails prevent degradation, maintaining structural integrity over time.
Stainless steel concrete nails represent a versatile option for wet areas such as bathrooms, providing excellent corrosion resistance when hammering a nail into the concrete. Copper variants, meanwhile, combine functional benefits with aesthetic appeal, making them suitable for decorative applications while still offering the necessary strength to secure materials to concrete surfaces.
Recommended Products
SECURE YOUR CONCRETE FORMS! The job-site solution for tackling unusual forming challenges and quickly securing form corners. Compatible with a solid 1-1/8 inch thick plastic coated sheet of plywood.
【One Cage, Infinite Gains】Why choose between a power rack and a functional trainer when you can have both? The DP01's innovative design maintains a compact depth while delivering an expansive 47.64 inches of interior training space. This means you can perform bench presses with full range of motion inside the safety of the full cage, then step outside to utilize the dual pulley system for hundreds of cable exercises.

Heavy-Duty & Durable Construction: Built with reinforced steel frames and high-quality industrial-grade materials, this tool chest is engineered to withstand daily use in demanding environments. The scratch-resistant and corrosion-resistant finish ensures long-lasting performance.
Essential Tools and Materials You’ll Need
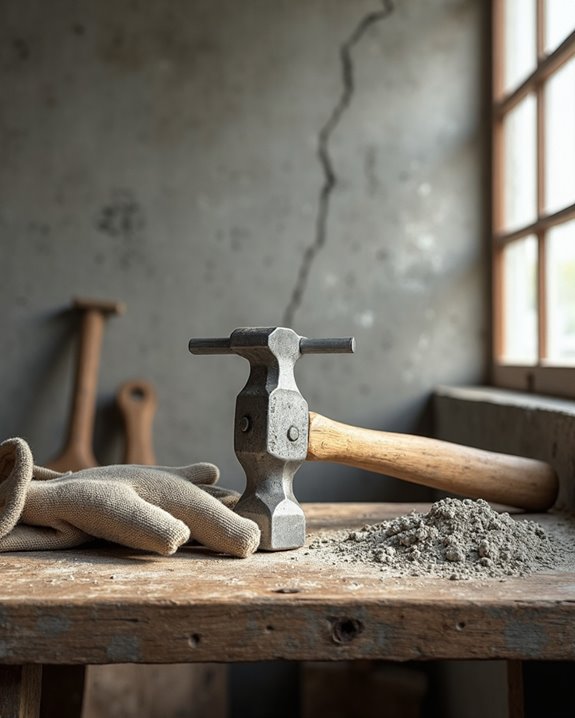
Successful installation of concrete nails without a drill demands a specific set of tools and materials, each serving an essential purpose in the process. The primary tool required is a 2-pound (0.91 kg) mash hammer, which delivers sufficient force to drive fasteners into concrete walls without mechanical assistance. Hardened masonry nails with fluted shafts, designed specifically for concrete penetration, form the essential fastening component of this technique.
Additional necessary items include a pencil to mark the location precisely before hammering begins, ensuring accurate placement of each nail. Safety glasses or other eye protection must be worn to shield against concrete fragments that may become airborne during installation. A measuring tool, such as a ruler or tape measure, allows for consistent spacing when installing multiple nails in a concrete wall, creating an organized and professional-looking result.
Recommended Products
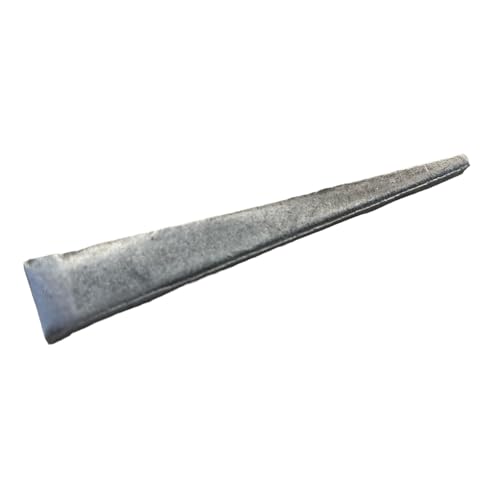
RUST RESISTANT & HEAVY DUTY: Our 3 inch Masonry Nails are made from Tempered Hardened Steel, which has been slightly oiled to resist rust. (Nail head is 1/2" wide, blunt end is 1/8" wide)

RUST RESISTANT & HEAVY DUTY: Our 2.5 inch Masonry Nails are made from Tempered Hardened Steel, which has been slightly oiled to resist rust. (Nail head is 1/2" wide, blunt end is 1/8" wide)
Ultimate Concrete Protection: Industrial-strength coating resists wear, chemicals, and moisture, ensuring long-lasting durability for concrete surfaces
Safety Precautions Before You Begin

Prioritizing personal safety before hammering nails into concrete, without proper precautions, can lead to serious injuries that could otherwise be easily prevented. Expert advice emphasizes that it’s important to guarantee proper eye protection with safety glasses, as fragments can cause permanent damage. When preparing to use a hammer on concrete surfaces, it’s equally important to use respiratory protection against concrete dust, which poses significant health risks when inhaled.
Remember to always protect your hearing with appropriate ear protection, as repeated impact noise can cause long-term damage. Valuable insights from professionals suggest implementing proper techniques to hold the nail with pliers rather than fingers, preventing potential injuries from missed strikes. These necessary safety tips and tricks create a foundation for successful concrete nail installation while maintaining physical wellbeing throughout the process.
Preparing the Concrete Surface

With safety measures established, attention now shifts to proper surface preparation, which forms the bedrock of any successful nail installation in concrete. Technicians should use a pencil to mark the exact position where the masonry nail will penetrate the concrete wall without guesswork. Before proceeding, thoroughly clean the surface without leaving any debris that could compromise stability when applying pressure with a hammer.
For projects requiring multiple fasteners, careful measurement guarantees proper spacing between each nail, typically 6-12 inches apart depending on the intended load. The concrete’s condition influences which tool works best, as rougher surfaces may benefit from fluted shafts that provide superior grip. Proper preparation creates ideal conditions for the nail to penetrate efficiently, reducing the force needed to hammer it securely and minimizing the risk of damage to surrounding material.
Step-by-Step Nailing Technique
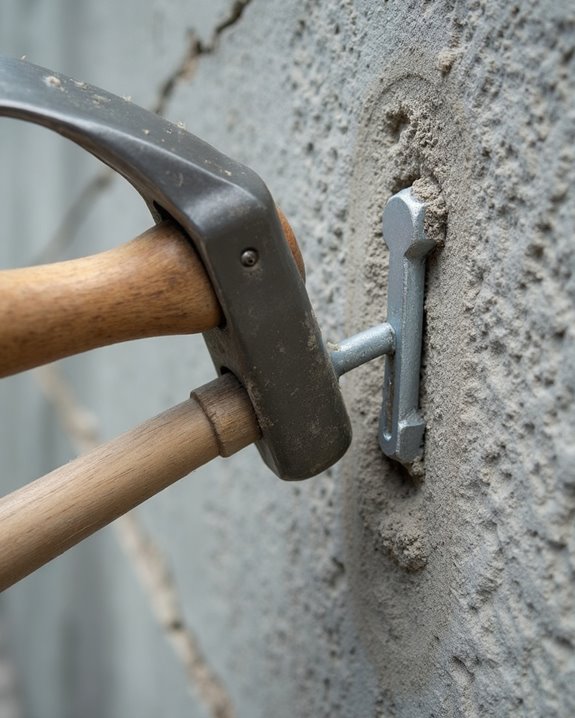
The proper nailing technique comprises five essential steps that guarantee secure fastening to concrete without specialized equipment. First, position the masonry nail, with its fluted shafts that help increase grip, against the marked spot and tap lightly using a hammer to create an initial depression. Next, apply consistent, straight strikes to drive the nail into the concrete without drilling, maintaining careful alignment to prevent damage to the wall. Unlike methods requiring a masonry drill or hammer drill, this approach only needs a hammer rather than wedge anchors or power tools.
The nail should penetrate until approximately 1/8 inch remains exposed, guaranteeing adequate projection to hang something without compromising stability. After installation, test the connection with gentle pressure to guarantee a secure hold before adding weight, and if necessary, remove the nail and reposition.
Tips for Preventing Wall Damage
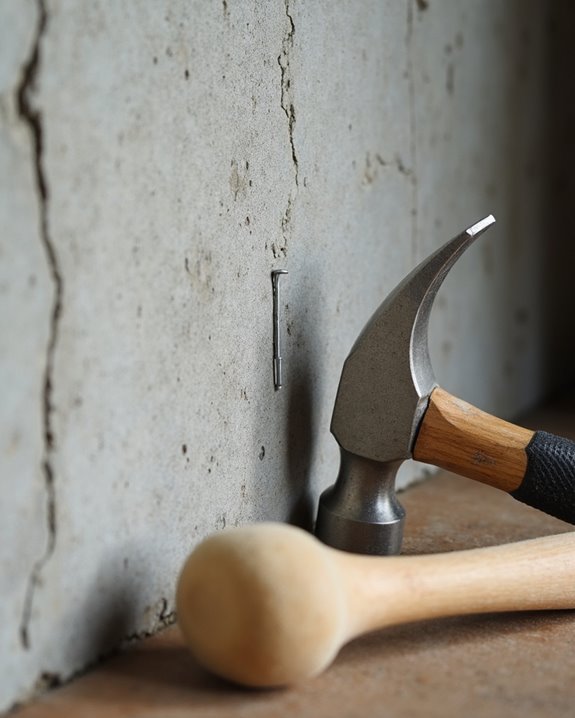
Preserving the integrity of concrete walls requires careful attention to technique when hammering nails without a drill. When installing a strong masonry nail or specialized anchor, professionals recommend tapping first with light pressure using a 2 lb hammer, preventing surface cracks that often result from damaging the wall with excessive force. Concrete walls remain structurally sound when nails are driven perfectly straight, avoiding uneven pressure that leads to spalling or fractures around the insertion point.
For best results, never hammer the nail flush to the surface; instead, leave approximately 1/8 inch protruding when you insert the anchor. Marking exact positions with a pencil guarantees even load distribution, while steadying the nail during installation maintains control. These careful measures greatly reduce the risk of compromising wall integrity during the fastening process.
Recommended Products

AWARD: Rated the Pro Preferred Nailer for 9 years running (2014 - 2022) by Builder and Developer Magazine

M18 Fuel 1-1/8" Sds Plus Rotary Hammer

ADJUSTABLE TOOL BAG SET - A comfortable belt for carpenters featuring our FatLip Bag Design, with 10” deep industrial nylon bags & leather-reinforced bottom and corners. This unique belt adjusts to fit seasonal size changes from 32” to 41”.
Alternative Methods for Lightweight Items
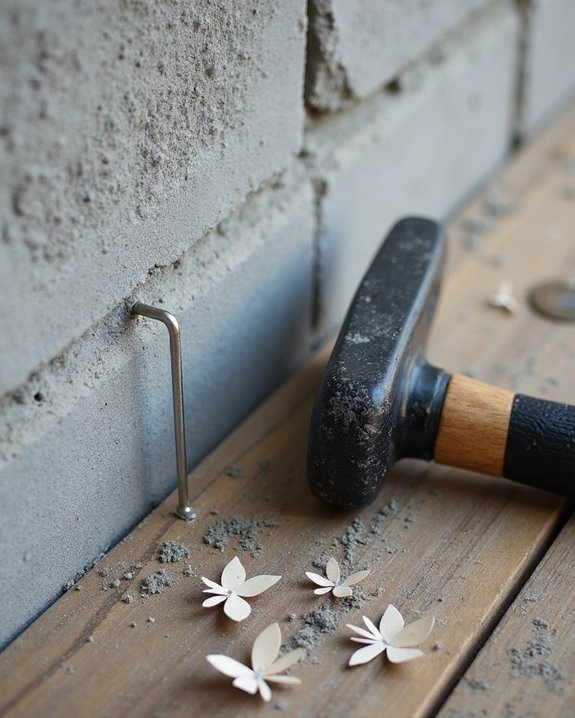
Mounting lightweight items on concrete walls doesn’t always require the force of hammer-driven masonry nails, as several gentler alternatives exist for items under a few pounds. Gaffers tape provides a temporary solution when working with concrete, allowing for quick positioning of hanging pictures while permanent fasteners cure. For more durability, applying epoxy to bond wood blocks creates a versatile attachment point appropriate for the weight of small decorative objects, requiring 24 hours to set fully before use. Cup hooks can be manually screwed into these wood pieces, offering a reliable way to suspend plants or lightweight décor without creating a small hole in the concrete. When small concrete anchors are necessary, they can be inserted into manually created openings using an anchor size specifically matched to the object being mounted.
Recommended Products
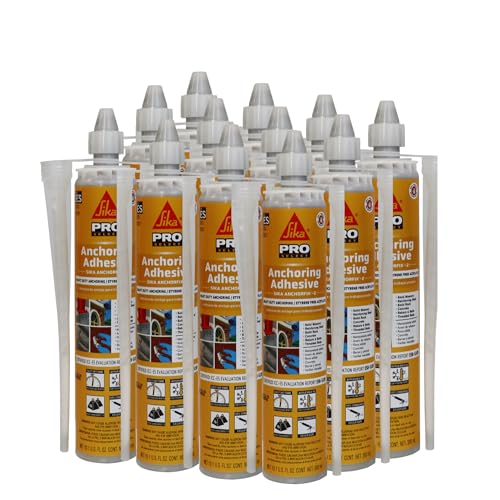
HIGH PERFORMANCE EPOXY — Sika AnchorFix-2 quikrete anchoring epoxy creates a strong, secure hold for threaded bars in uncracked concrete, solid masonry, steel, and similar hard and tough materials
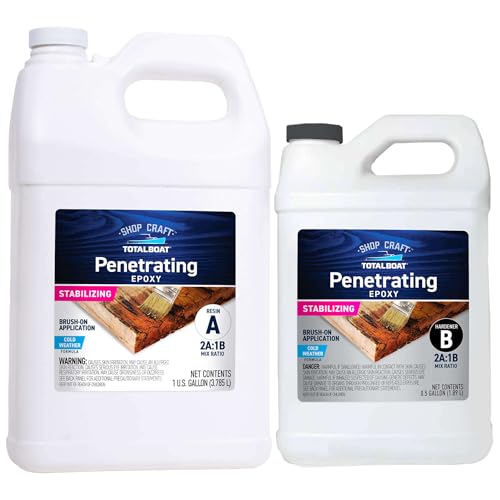
WOOD HARDENER FOR ROTTED WOOD: two-part epoxy system seals, hardens, preserves, and protects all types of wood by stopping rot. Makes finishes like paint and varnish stick better and last longer. Easy to use treatment has no VOCs or harsh fumes

HIGH-STRENGTH FASTENING SOLUTION: Quickmast Anchor AE15 is the ultimate anchoring solution for a variety of loads from handrails to heavy machinery. This high-strength anchoring epoxy acrylate ensures secure fastenings in concrete for rebar, threaded rods, and more; making it ideal for both light and heavy-duty applications.
When to Consider Professional Help
When should a homeowner recognize that hammering nails into concrete has exceeded their DIY capabilities? Several warning signs indicate the need for expert intervention, including shattered nails, poor fastener hold, or concrete damage like spalling. The team at Fastening Specialists, with over 65 years of experience as a trusted resource, can provide advice and best practices for challenging installations, particularly when dealing with aged structures or load-bearing applications.
Compliance with local building codes requires proper fastening techniques, especially for structural components where failure could create safety hazards. Building codes and engineers specify minimum strength requirements that DIY methods might not achieve. Specialists in this field possess both technical knowledge and code expertise necessary for ensuring installations meet safety standards. Professional contractors like WestVillage bring essential experience when concrete properties are questionable or project complexity increases beyond basic applications.
Recommended Products

ARENA-STYLE LOOK AND PERFORMANCE - In-ground basketball hoop directly installs into ground and secured by concrete inside pole and around pole. No anchor kit required.

SHARP AND STURDY: These heavy duty tent stakes are suitable for many kinds of soil, asphalt, and even concrete with proper drilling. The tips of the spikes are sharp and can penetrate the lawn base (grass, sand, clay, etc. ) easily and stay in place. They are easy to use & durable enough without bending.

3-PIECE KIT allows for simple placement and removal of concrete form stakes
Frequently Asked Questions
Can You Use a Hammer to Nail Into Concrete?
Yes, one can use a hammer to drive masonry nails into concrete. HammerTechniques involve controlled tapping with a mash hammer, while SafetyRisks require eye protection as NailStrength must withstand ForcePhysics during penetration into dense MaterialScience.
How to Attach Something to a Concrete Wall Without Drilling?
Items can be secured to concrete walls without drilling using adhesive hooks, suction cups, magnetic mounts, Velcro strips, Command strips, glue dots, tape mounts, bracket glue, clamp holders, or wall magnets depending on the item’s weight.
How to Put a Nail in a Wall Without a Drill?
Light tapping with a mash hammer can drive masonry nails into concrete walls. Alternatively, wall anchors, adhesive hooks, picture hangers, suction cups, Velcro strips, magnetic mounts, tape methods, frame clips, decor fasteners, and surface adhesives offer drill-free solutions.
Can You Put a Nail Into a Concrete Wall?
Yes, one can insert masonry nails into concrete walls. Concrete density requires specific nail material for wall integrity. Expert advice recommends proper safety precautions against hazards. Durability factors, aesthetic impact, and tool alternatives should be considered before installation.


