As an Amazon Associate, we earn from qualifying purchases. Some links on this site are affiliate links at no extra cost to you. Our recommendations are based on thorough research and editorial judgment.
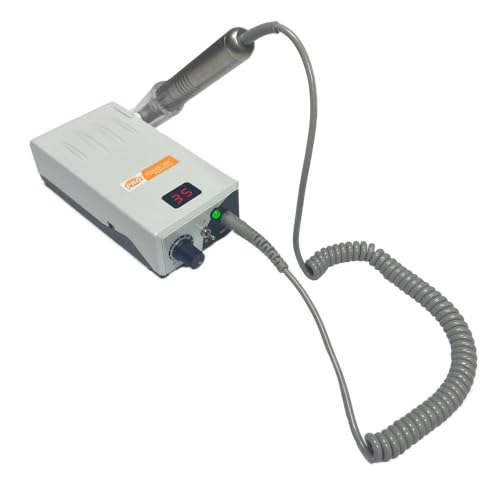
Nail Drills Explained
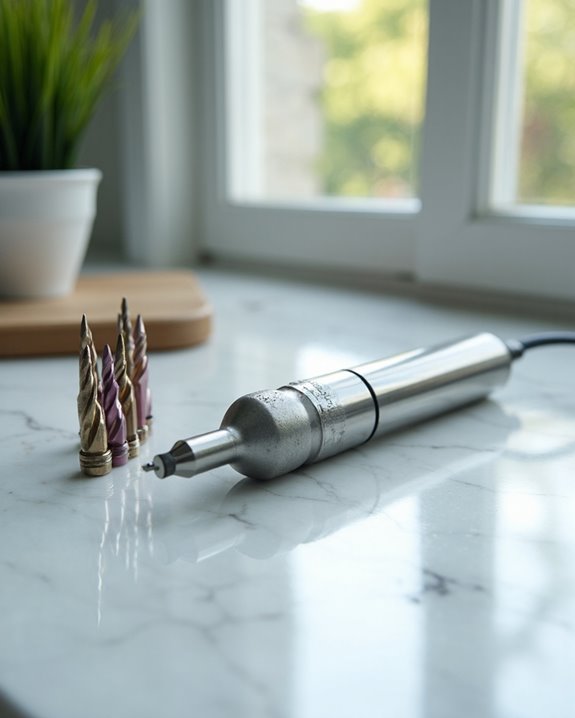
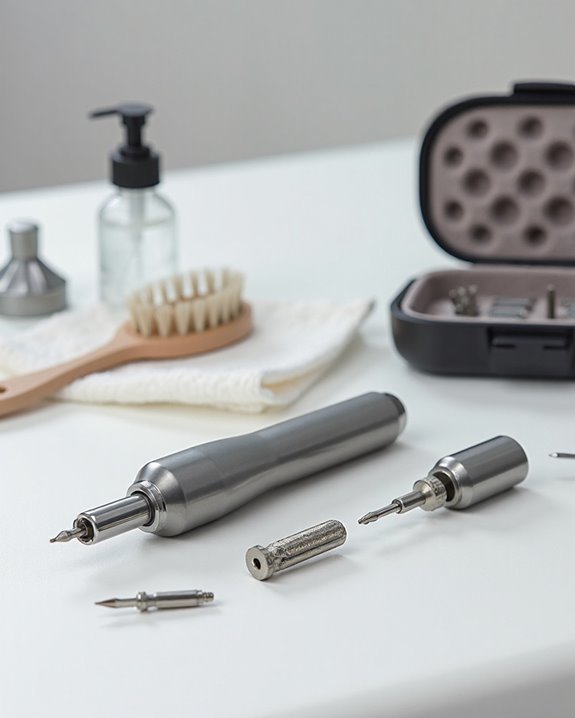
Nail drills are electric tools ranging from 25,000-35,000 RPM that use interchangeable bits for precision nail care. Various bit types serve specific functions: barrel bits for surface work, needle bits for tight spaces, and cone bits for cuticle preparation. Materials matter greatly, with carbide offering durability, ceramic reducing heat, and diamond providing precision. Proper maintenance includes regular cleaning of bits with brushes and acetone soaks, extending their lifespan to approximately 300 uses. Further exploration reveals techniques for selecting appropriate speeds based on experience level.
Key Takeaways
- Electric nail drills feature interchangeable bits for precise filing at speeds from 25,000-35,000 RPM.
- Different bit types serve specific functions: barrel for surface work, pointed for tight spaces, cone for cuticles.
- Bit materials include carbide for durability, ceramic for heat reduction, and diamond for precision work.
- Speed selection is crucial—beginners use 25,000 RPM maximum while professionals may operate at 35,000 RPM.
- Proper maintenance involves regular cleaning, using appropriate bits for each task, and safe operation practices.
Nail Drills Explained
Workhorses of the nail care industry, nail drills provide precision and efficiency that manual filing simply cannot match. These electric tools feature a hand piece that holds interchangeable drill bits designed to rotate at varying speeds, ranging from beginner-friendly 25,000 RPM to professional-grade 35,000 RPM models. Different materials serve specific functions: carbide bits offer durability for tough services, ceramic bits reduce heat during extended use, and diamond bits deliver precise exfoliation and shaping.
Nail technicians rely on these devices to remove gel polish, shape nails, and work with artificial enhancements in a fraction of the time required by manual methods. Proper maintenance, including regular bit cleaning, guarantees best performance and longevity of the equipment. For safety and control, practitioners should start at lower speeds while applying minimal pressure to protect the natural nail during services. When selecting a nail drill, consider models with extended battery life for uninterrupted mobile services.
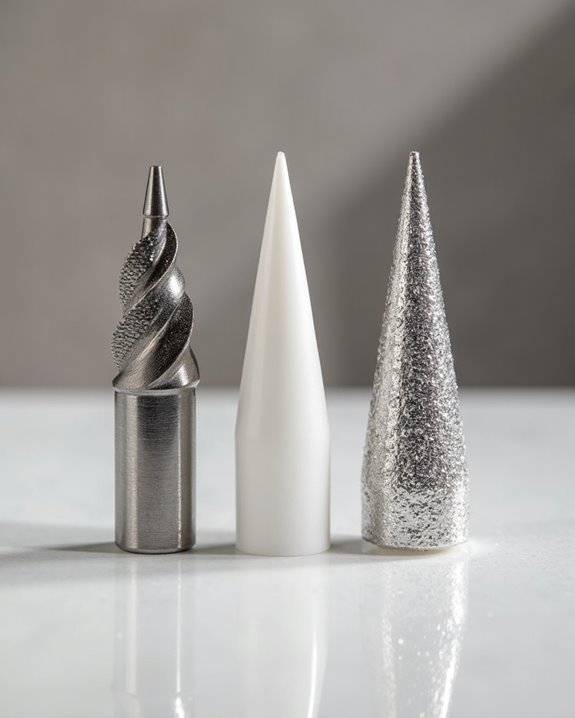
Essential Types of Nail Drill Bits and Their Functions
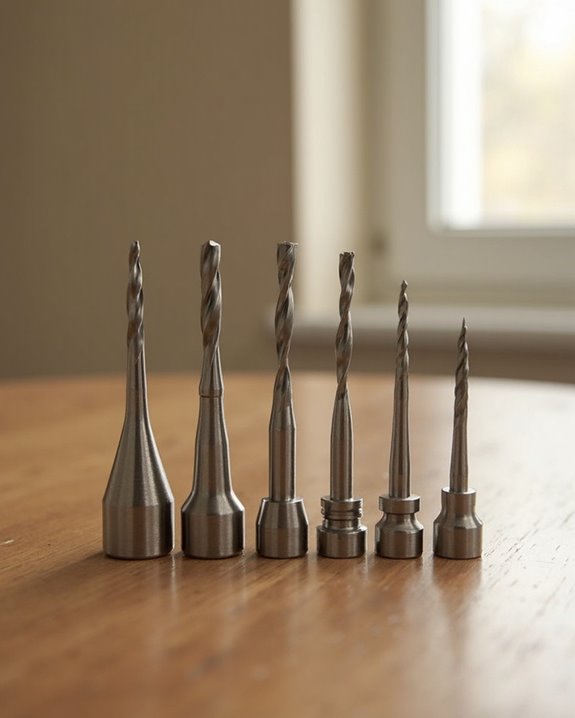
Successful nail technicians recognize that selecting the right drill bit transforms their efficiency, with each type serving a specific purpose in the nail enhancement process. Barrel bits excel in surface work like backfill cutting and shaping, while pointed needle bits access tight spaces under nails and sidewalls. The tapered shape of cone bits makes them ideal for cuticle preparation and cleaning sidewalls, though less suitable for fingernail surfaces. Safety bits, featuring rounded tops, provide protection when working on delicate cuticle areas and in-fills without risking damage. Mandrel bits, available in various materials, hold disposable sanding bands in different grits for shine removal and surface preparation. Carbide bits and flame bits complete the essential collection, each designed for specific nail enhancement techniques that require precision and control. For enhanced durability and performance, consider using bits made from tungsten carbide to withstand wear and high temperatures during manicures.
Recommended Products
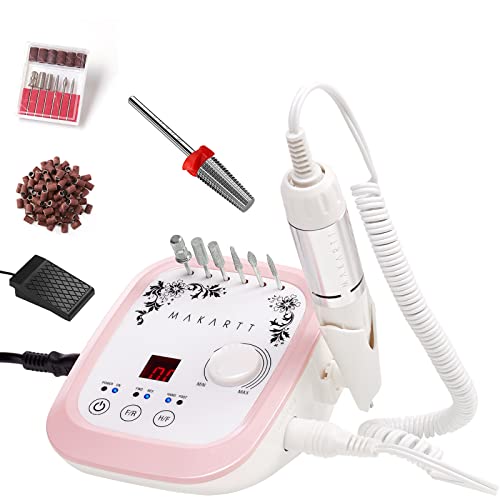
Makartt brand always forcus on nail art products, including nail drill machines and nail bits. Made of carbide, the hardest material next to diamonds, Makartt drill bits have perfect performance on nail design work. package in a little gift bag, portable and best choice for as a gift for your girl firend, sister, momther.
![Original KMIZ Nail Drill Bit [5‑Pack] - Carbide Cone, 6.0 mm, Medium Cross‑Cut, 3/32" Shank - E‑File Bit for Gel & Acrylic Removal, Infills & Callus Treatment - model TCO-Sp 060-M](https://m.media-amazon.com/images/I/417GWQGPUlL._SL500_.jpg)
5‑Pack KMIZ Nail Drill Bit TCO-Sp 060-M - medium cross-cut tungsten carbide cone bits with a 6.0 mm head and 14.0 mm working part, designed for removing overlay materials, cleaning excess buildup, and treating calluses during e-file manicures and pedicures. The medium cross-cut sits between the coarse cone (TCOD 060-C) for maximum speed and the triple cross-cut (TCO-Tri 060-M) for smoothest finish - a balanced all-rounder for daily salon use. Manufactured by KMIZ - a medical instrument factory established in 1931, producing on Swiss Rollomatic CNC equipment.

**Turn Hours into Minutes.**For busy techs, time is revenue. Our industrial-grade Tungsten Carbide nail drill bits (coated in Titanium Nitride) feature a razor-sharp 2XC "Typhoon" shape that shreds through thick acrylic nails and hard builder gel like butter. No clogging, no stalling. Clear a full set in half the time and fit more clients into your day.
Materials That Make the Difference: Carbide, Ceramic, and Diamond
The material composition of nail drill bits greatly impacts their performance, durability, and application method when used for nail enhancements. High-quality bits are made of a variety of materials, each offering distinct advantages for specific techniques. Flame carbide bits, constructed from durable metal, excel at efficiently removing acrylic nails and can be reused multiple times with proper care. Ceramic bits feature fluted teeth in varying sizes that determine grit levels while reducing heat buildup, making them ideal for comfortable filing sessions. Diamond bits, embedded with actual diamonds, provide precise abrasive surfaces for detailed cuticle work, with flame bits available in fine grits for delicate areas. Different materials of nail drill bits allow technicians to choose the appropriate tool based on whether they need heat reduction, durability, or gentle exfoliation. For instance, tungsten carbide bits maintain their sharpness over extended use, ensuring consistent results for acrylic applications.
Recommended Products


The boxed set includes 13pcs : 12pcs drill bits diameter 6/8/10/13/16/25/32/35/45/51/65/102mm(1/4 inch,5/6 inch,3/8 inch,1/2 inch,5/8 inch, 1 inch, 1-1/4 inch,1-3/8 inch,1-3/4 inch,2 inch,2-1/2 inch,4 inch) and 1pc sds to 5/8 inch-11 adapter
Selecting the Right RPM Speed for Your Nail Artistry Level

Just as bit material determines performance capabilities, speed selection plays a foundational role in nail drill effectiveness and safety. Beginners should select electric nail drills with maximum speeds of 25,000 RPM, providing sufficient power for shaping nails or removing poly gel without discomfort. Those finding high speeds challenging may prefer models limited to 18,000 RPM for basic filing tasks.
Professional nail technicians handling multiple clients daily benefit from drills reaching 30,000 RPM, like the Geneviere, making work easier and will save valuable time when working with acrylics and gels. Advanced technicians performing precise carving should consider 35,000 RPM models such as the Stephanee. Regardless of expertise level, most nail drill operations occur below maximum speeds, emphasizing the importance of starting lower and adjusting based on different uses and purposes with the right bit.
Recommended Products

【2-In-1 Integrated Professional System】 Combines a high-performance 30,000 RPM nail drill and a powerful integrated dust extraction system into one sleek, compact unit. Perfect for professional nail technicians seeking a clean, dust-free workspace during heavy filing and shaping.
High-Speed Professional Performance: This electric nail drill delivers a powerful 50,000 RPM, providing the efficiency needed for a variety of tasks. It is suitable for quickly and effectively filing acrylic nails, removing gel polish, and shaping natural nails.
Professional Power and Precision with 35K RPM Brushless Motor - Designed for nail technicians, this professional nail drill delivers high torque and 35,000 RPM for seamless gel polish removal, acrylic shaping, and manicures.
Pre-Use Preparation: Charging, Bit Selection, and Safety Attire
Properly preparing a nail drill before use constitutes an essential step for both safety and ideal performance, requiring attention to several key preparatory measures. The device should be fully charged before operation, ensuring it remains unplugged during use to prevent short circuits that could damage the motor. Selecting appropriate bits proves vital, with fine or medium sanding bands being safe and effective for natural nails without damaging the nail bed. Different shapes, such as Tapered Barrel bits with a Smooth Top, provide specialized functions, while avoiding metal or rubber bits with coarse textures on natural nails prevents thinning and pain. Practitioners should wear appropriate safety attire, including masks for respiratory protection, while securing loose hair and avoiding baggy sleeves that might become entangled in the high quality rotating components.
Recommended Products

Kiara Sky's Drill Bit Family in Black! Now you can purchase 17 of Kiara Sky's Beyond Pro Drill Bits together and achieve the ultimate nail kit.

All-In-One Diamond Bit Set for Beginners: Including 1pcs Makartt 2023 new design Tapered Barrel bit with cross teeth to make the nail bit faster to remove nail gel and cuticle and more durable. 9pcs commonly used cuticle trimmer drill bits perfect for nail shaping, polishing, buffering, and grinding for nail care prep and soft gel removal.

【The "Russian Manicure" Standard - Precision】 Sculpt, Don't Just Grind.Forget cheap bits that tear skin. This ”tungsten carbide nail drill bits set“ features the holy grail of Russian Manicure: the precision Flame and cuticle ball bit. The fine cross-cut teeth gently lift the eponychium and exfoliate dead skin without heating up, giving your clients that photoshop-finish "clean girl" look. Ideal for cuticle clean and prep work.
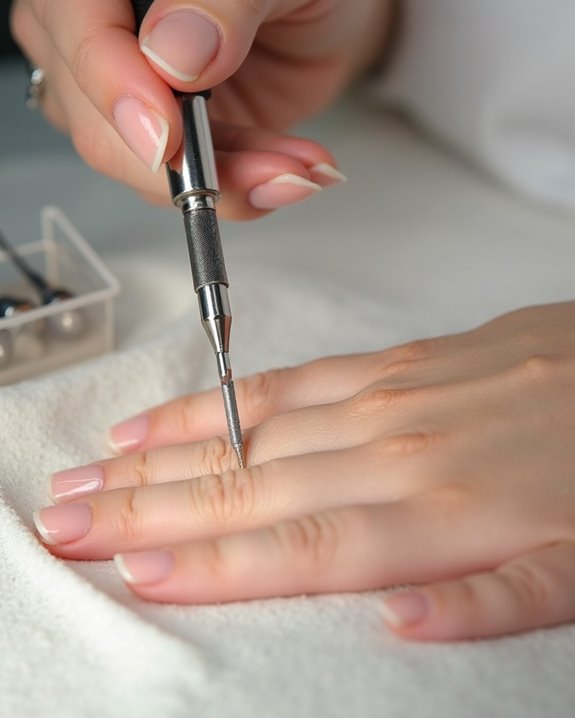
Proper Techniques for Effective and Safe Nail Drill Operation
Moving from preparation to actual operation, successful nail drill usage depends upon mastering specific handling techniques that prioritize both client comfort and nail integrity. Technicians must select the Correct Bit for the Job, avoiding Medium and Coarse options on natural nails that could remove excessive material. Quality Bits in various Shapes and Sizes allow professionals to address different needs, from removing Dead Skin to precise detailing.
During operation, technicians should establish a stable anchor point by securely gripping the finger, using lower speeds with minimal pressure in gentle circular motions. This approach reduces vibration and prevents overheating of Nail Drill Bits, whether Rubber or Metal. After completion, technicians should thoroughly clean instruments in soapy water, then Soak the Bits in acetone for 5-10 minutes, never submerging the motor component.
Recommended Products

Brand New in box. The product ships with all relevant accessories

DCD985 20V MAX hammerdrill with patented 3-speed, all-metal transmission and 1/2" all metal ratcheting chuck delivers 535 units watts out of maximum performance, faster application speed, and superior bit retention
Includes: 1/2" (5/8" Bar Stock), 1/4" (3/8" Bar Stock), 3/8" (1/2" Bar Stock) Bowl Gouges; 1/4", 3/8", 1/2" Spindle Gouges; 1", 1 1/2", 3/4", 1/2" Round Nose Scrapers; 3/4" Square Nose Scraper; 3/4" Diamond Parting Tool; 3/4" Oval and 1" Skew Chisels; 1", 2" Spindle Roughing Gouge
After-Use Maintenance: Cleaning, Sanitizing, and Storage Practices
Professional nail drill maintenance requires consistent, thorough cleaning procedures to preserve performance and protect client health. After each specific nail drill bit is used, technicians must make sure to brush away debris, wash in soapy water, and soak in acetone for 5-10 minutes. While carbide and ceramic Nail Bits are great for multiple uses, sanding bands made of rubber should be discarded after a single client.
Proper sanitization between clients prevents infection transfer, particularly with bits that shave off products or come in direct contact with natural nails. Technicians should avoid soaking the hand piece in acetone to prevent motor damage, and always replace the safety bit after cleaning. Once nail drill bits come clean, store them in a dedicated storage bag to maintain organization and extend their service life of 150-300 uses.
Frequently Asked Questions
What Do the Colors of Nail Drill Bits Mean?
Colors of nail drill bits primarily indicate the carbide material used. Gold and silver symbolize durable materials with heat-resistant properties. Color codes aren’t directly related to grit levels, which depend on flute cut size rather than pigment significance.
What Speed Should My Nail Drill Be On?
Nearly 80% of nail complications stem from improper speed settings. Beginners should use 18,000-25,000 RPM for basic tasks, while professionals may operate at 30,000-35,000 RPM. Most users work below maximum speed for safety and control.
How to Choose the Best Nail Drill?
When selecting a nail drill, evaluate brand options, motor strength, ergonomic grip, and durability ratings. Compare prices, power sources, portability features, and included accessory kits. User feedback and warranty coverage provide additional insights into long-term performance.
What Is the Difference Between R and F on a Nail Drill?
Why do nail drills have different settings? The direction switch toggles between Forward (F) for clockwise rotation and efficient standard filing, and Reverse (R) for counterclockwise operation that reduces heat, minimizes bit wear, and enhances nail care safety.